Laundry Room Makeover
This is my very first blog post! I’m so excited to get this rolling and that you’re here with me! I have wanted to have a blog to show you how I completed this project because I love talking about the process and encouraging other people to take the plunge and paint their floors to update their home on a budget! I am SO happy with how it turned out and how it is holding up. As I’m writing this, it has been over a year since I updated the laundry room and painted the floor, and I would do it again in a heartbeat!

Here’s a little background about my house that will give you some understanding of where it was when I moved in and where the projects come from. So let me start by telling you how this laundry room makeover came about…
I moved into my husband’s grandparents’ house when we got married, and had a blank slate to work with. Before I moved in it was a TRUE bachelor’s pad. So I really got to start from scratch and make each room exactly how I wanted! Plus, I have a great husband that is always supportive of my ideas and visions for our home. After painting a few rooms initially, and getting settled in as a newly married couple, I was ready to tackle a little bit bigger project and get more creative.
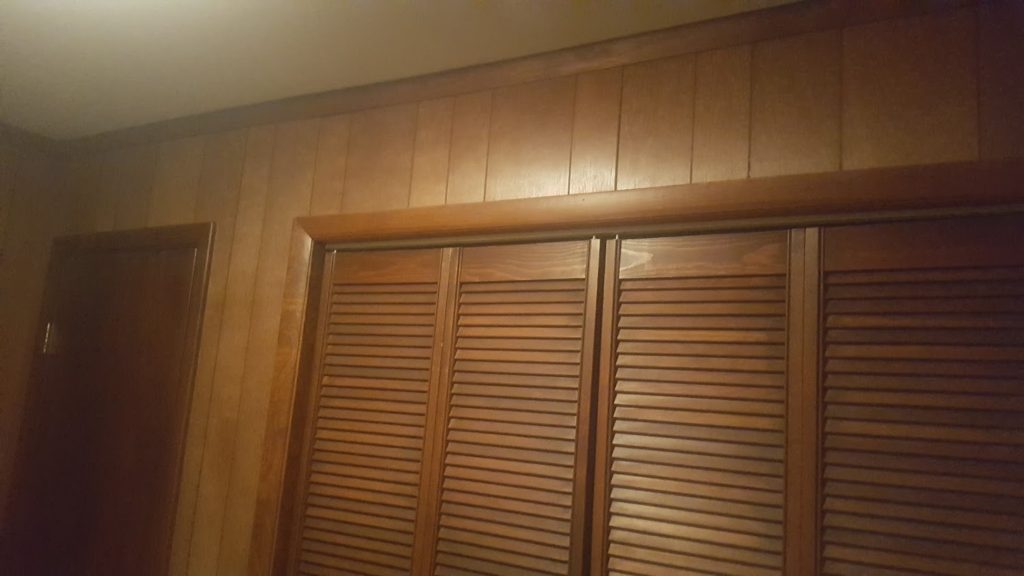
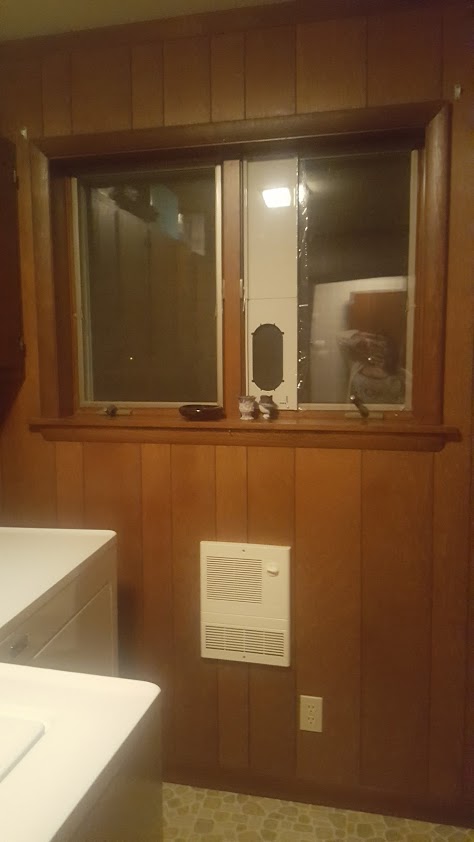
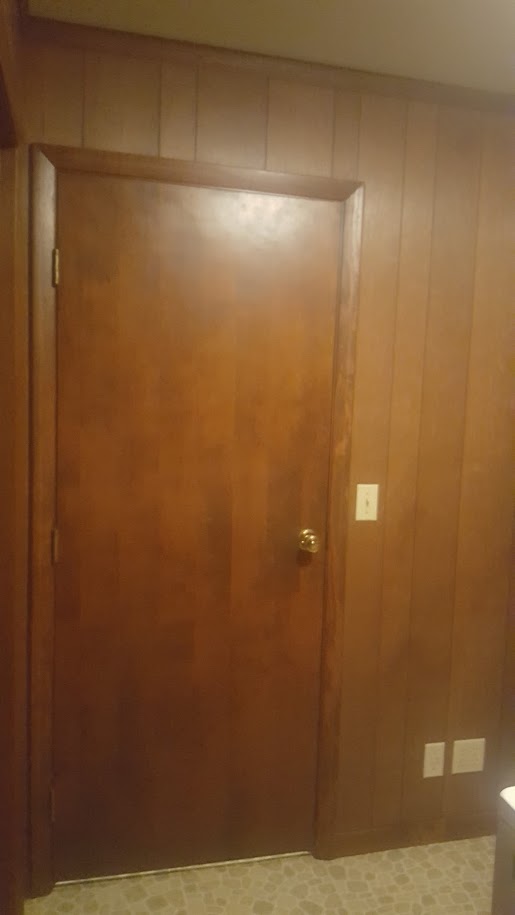
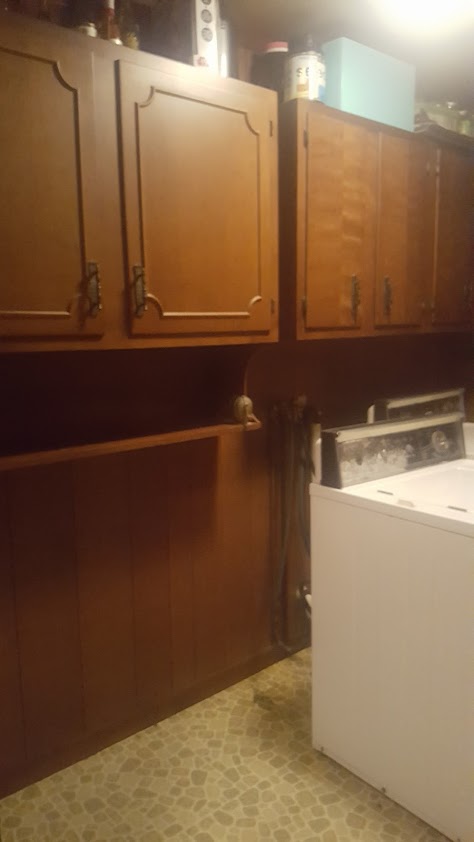
I started with the laundry room– here is a view of how it looked before:
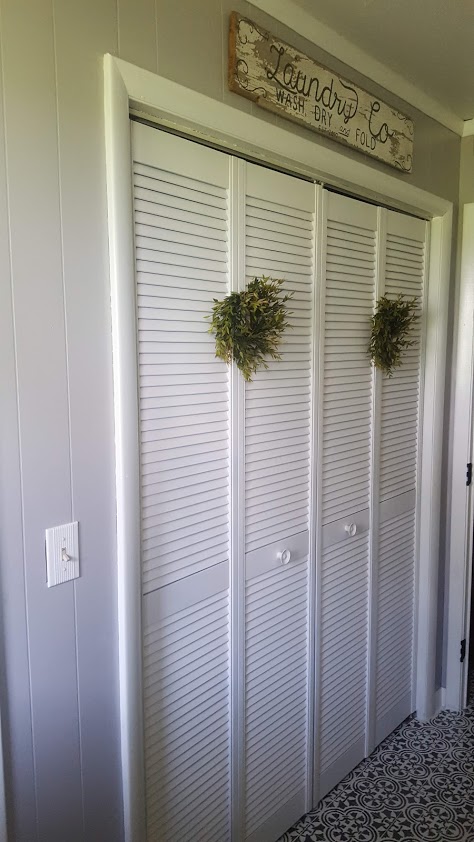
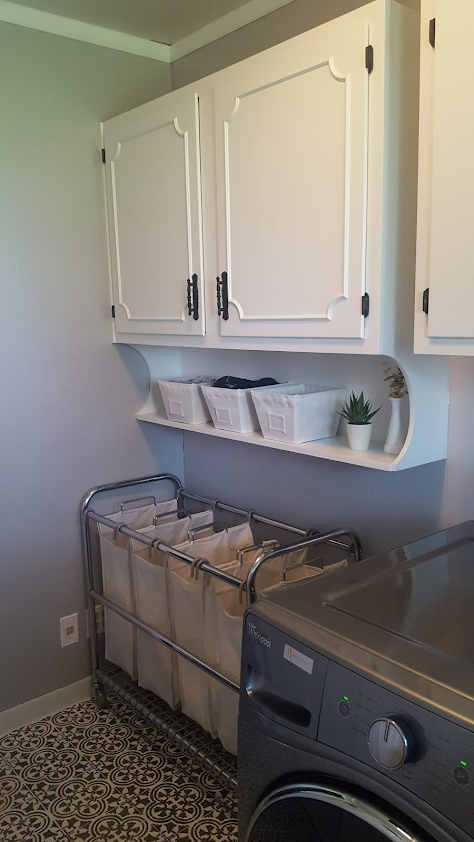
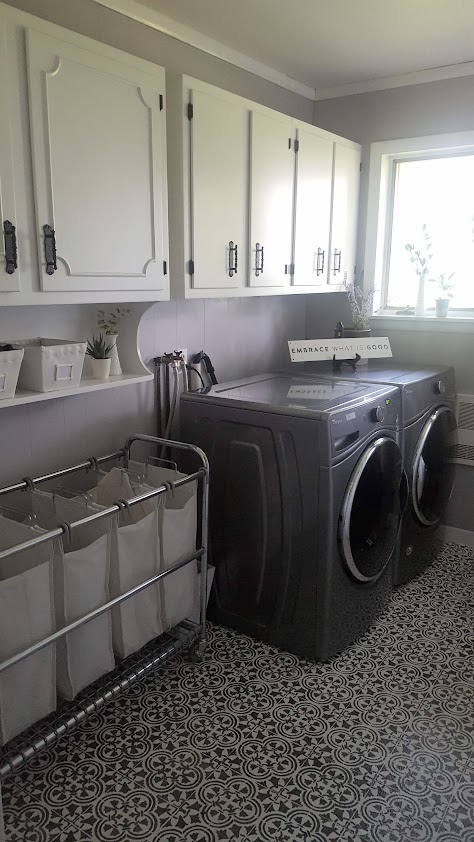
The house was built in the early 80’s and hadn’t been updated much since. Even with a window in the room, the laundry room was so dark with all that dark wood. It was always a room I just shut the door to hide rather than enjoy this space that we all spend way too much time in! So I decided to lighten it up by painting the cabinets and with the suggestion of my extra creative sister, I decided to paint the floors too. It’s amazing how paint can transform a space! And I’m so excited to share with you how it transformed my laundry room!
Here are the steps I took to transform my laundry room with only paint:
PAINTED CABINETS
- First decide what colors you want. I wanted light colors to brighten up the room and feel clean and welcoming. I chose Summer Gray for the cabinets and Intuitive Gray for the walls
- Take all hardware off cabinets. My husband was a huge help here to preserve my sanity.
- Sand all cabinets and doors. I used an electric sander to get the flat surfaces and used a sheet of sand paper to get around all of the grooves. After you get done sanding, be sure to wipe them down with a damp cloth to get all the dust off of them.
- Prime the cabinets. I used Valspar Stain Blocking Bonding Primer and applied 2 coats for the best coverage. If you have light wood cabinets you may only need one coat, but mine were super dark wood so I needed two.
- Time to make those cabinets WHITE! Finally!! After all of that wishing and prepping, you’re getting white cabinets! The best paint I found for the job is Valspar Cabinet Paint. It is self leveling, provided great coverage, and more than a year later it is still looking great! Just like with the primer, I applied two coats of the cabinet paint.
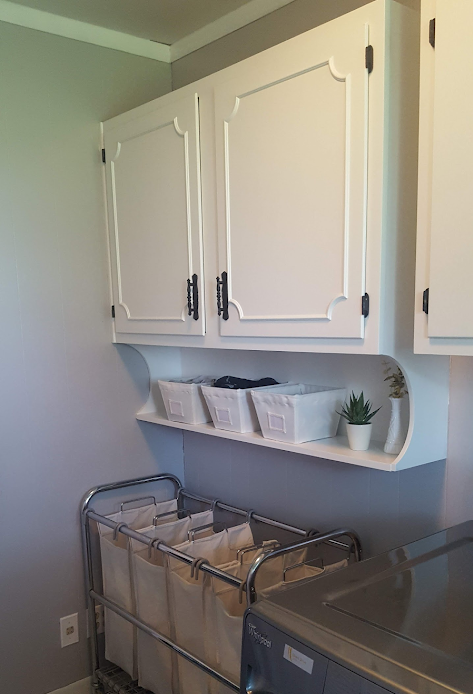
Okay, so after I had the cabinets bright white I had to do something with those only laminate floors. If I haven’t already said this, we are currently renting our house and don’t want to put a lot of money into updating it, but still want to enjoy it and be proud of it while we live here!
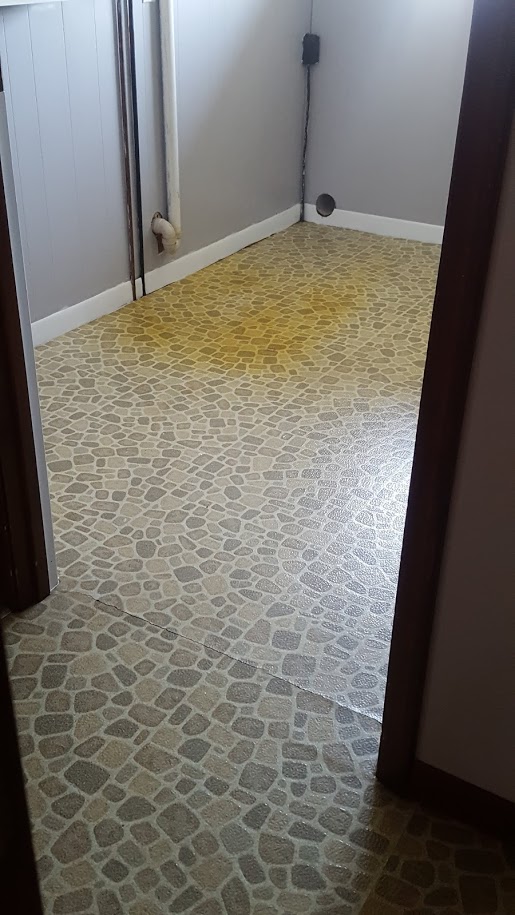
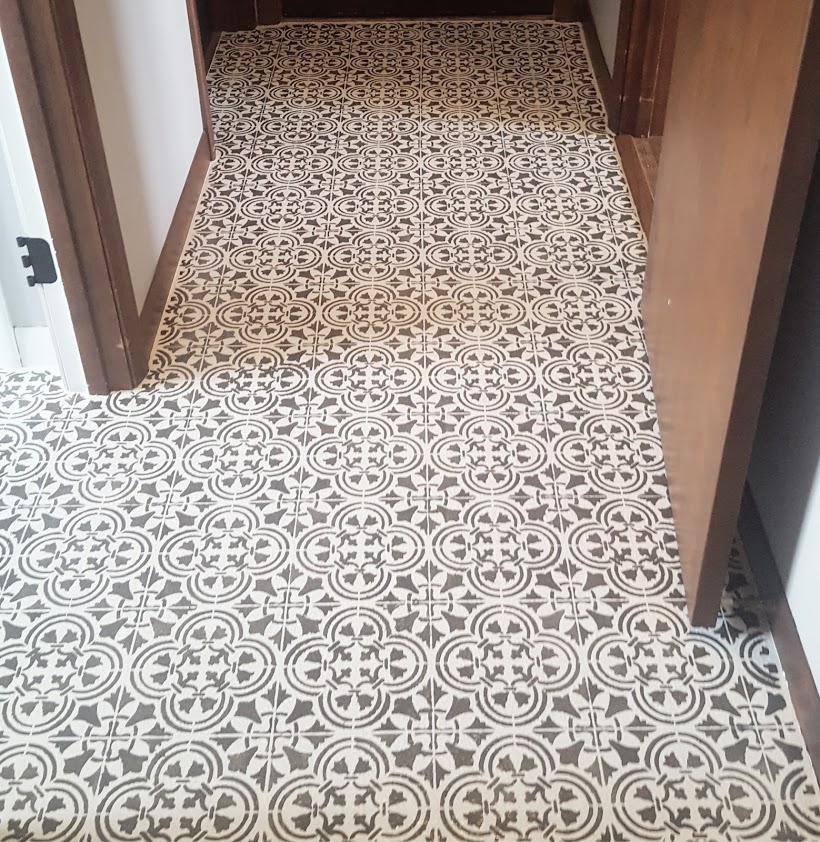
So, for the floors I decided to stencil them! I figured it couldn’t get much worse than they already were and if it didn’t turn out great we could just try something else, or put in an inexpensive updated floor. The current floor was discolored from years of the washer dripping on top of it, and there were several visible cracks. So we went for it with the stencil…. and I was amazed how well it turned out!! (And how well it has held up after 1 1/2 years!)
STENCILED FLOOR
- Prep the floor. I have a laminate floor, so to prep it for the primer and paint to adhere well I used an electric sander and ran it over the entire floor to rough it up.
- Clean the current floor. You want to make sure to clean the floor really well so the paint adheres to the floor and will hold up well. First I cleaned the floor with Mrs. Meyers Clean Day peony scent spray. (I did this project in April, so it made my house smell so fresh and springy!) Then I wiped the floor down with rubbing to make sure all of the dust and oils were picked up.
- Prime. I had some tedleft over primer from painting the walls that I used. Any primer should work for the floor. I applied two coats of primer since I was using a white paint as my base color for the floors.
- Paint base color. If you’re going to stencil like I did, you’ll need to choose two colors, one for the base, and one for the stencil. I wanted a pretty drastic difference in my colors to make these floors pop. So I applied two coats of white Valspar Floor and Porch Paint as my base color. I read a lot of other blogs and testimonials before I decided on which paint to use– and honestly everything I read said to use chalk paint and cover with polyurethane. But when I went to the store to get my supplies I discovered Valspar Floor and Porch Paint. It doesn’t require a top coat, so it’s less money to be spending on multiple products, and I knew once I completed my stencil I would want to be done– I wouldn’t want to apply another 2-3 coats of polyurethane. So I used Floor and Porch Paint for the base and stencil colors, and I love it!
- Paint stencil Design. Now comes the fun part! (Or the not-so-fun tedious part… depending on how you look at it.) But you want that stenciled floor! So it’s fun to see it all come together with the look you envisioned, and that feeling of accomplishment is great! Choose your stencil design. I love the Augusta tile stencil from Cutting Edge Stencils, and you can get it on Amazon! I used Valspar’s Peppercorn Floor and Porch Paint. I started stenciling in the back corner underneath where the washer and dryer would go so I could get the hang of it before I would be stenciling the most visible part of the floor. I had the best results by using a small sponge roller (like for cabinets) and rolling it in the pain, then rolling it over a paper towel a few times to remove the excess paint, then painting over the stencil. The other step that made my stencil design clean was using painters tape to tape down the stencil before painting each time. Wipe off the back of your stencil in between each square to keep a clean design. ( I have a video saved to my Instagram highlights you can watch.) It can be challenging to get close to the wall around the perimeter or to get the corners– I have heard of people cutting their stencil at the end to do this, but I knew I may want to use my stencil again (and I did end up using it again, so I’m glad I didn’t cut it!) so instead, I got as close as I could to the wall and in the corners by bending my stencil and maneuvering it around, but I ended up touching up the design where necessary with a small paint brush to get the best look. After you’re done stenciling, do your best to not walk on the floor for a couple days to let the paint cure. (I tried to stay off of mine for about 3 days.)
The floor has held up very well and I have been very happy with my choice to use the Valspar Floor and Porch Paint! It was easy to use, required the lease amount of coats/steps, and I didn’t have to waste my time with a clear topcoat. Because I used this in my laundry room it does get water on it from time to time, and if a little water drips out of the washer or pools up a bit, I have noticed it and wiped it up without any damage to the floor! However, right after I finished the floor and washed out my roller, I left the roller sitting out on the floor for about 2 days and later noticed the water left in the roller had dripped onto the floor and removed the paint when I wiped it up. SO…. that curing time is important to keep it from getting wet or disturbed. Since that time I had not had any problems with water!
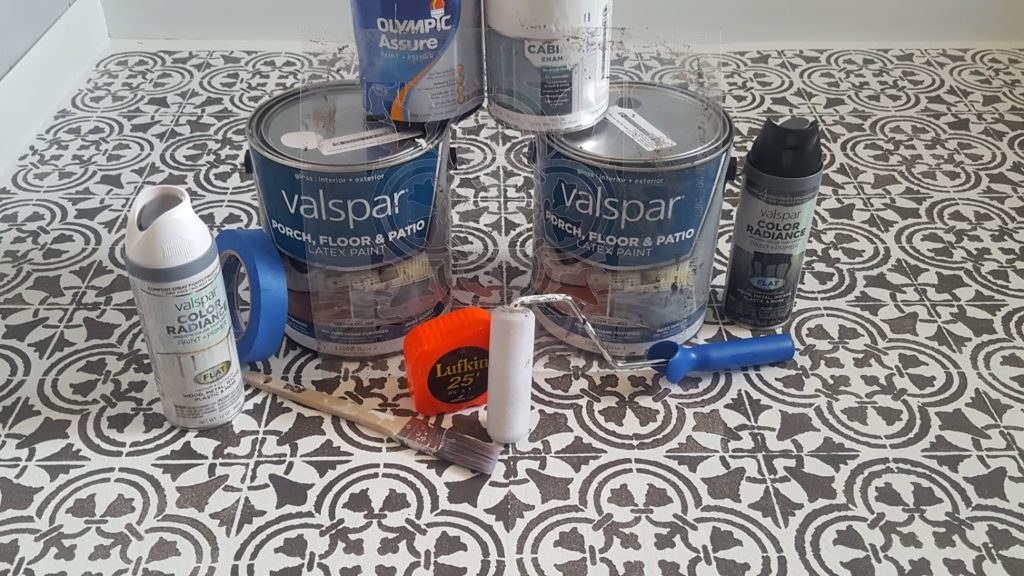
I hope this has made you excited to stencil your floor if you’ve ever wanted to do it! Since doing my laundry room I did stencil my entry way because I loved it so much. Please leave me a comment or reach out to me with any questions or hesitations you have, and I would love to help out! Or if you’ve stenciled a floor using another method I’d love to hear about your process.
Happy Stenciling!
XOXO
DIY Jojo ♡
4 Comments
Audrey Wilson
Nice makeover. I, too have an older house and would like to redo some things in the house. You have encouraged me. Thank you.
DIY Jojo
Audrey, I’m so glad this has encouraged you to complete some DIY projects of your own! Please come back and share your project once you get it started, I would love to see what you’re working on!
xoxo DIY Jojo
Ora Ford
Congratulation what l saw was very helpful plan to follow you keep up the good work.”Ora Sharing” will share.
DIY Jojo
Ora,
Thank you for your encouraging words and for following along with Lotus Charm!
xoxo DIY Jojo